Manage Event Information |

|

|

|
|
Manage Event Information |

|

|

|
|
|
||
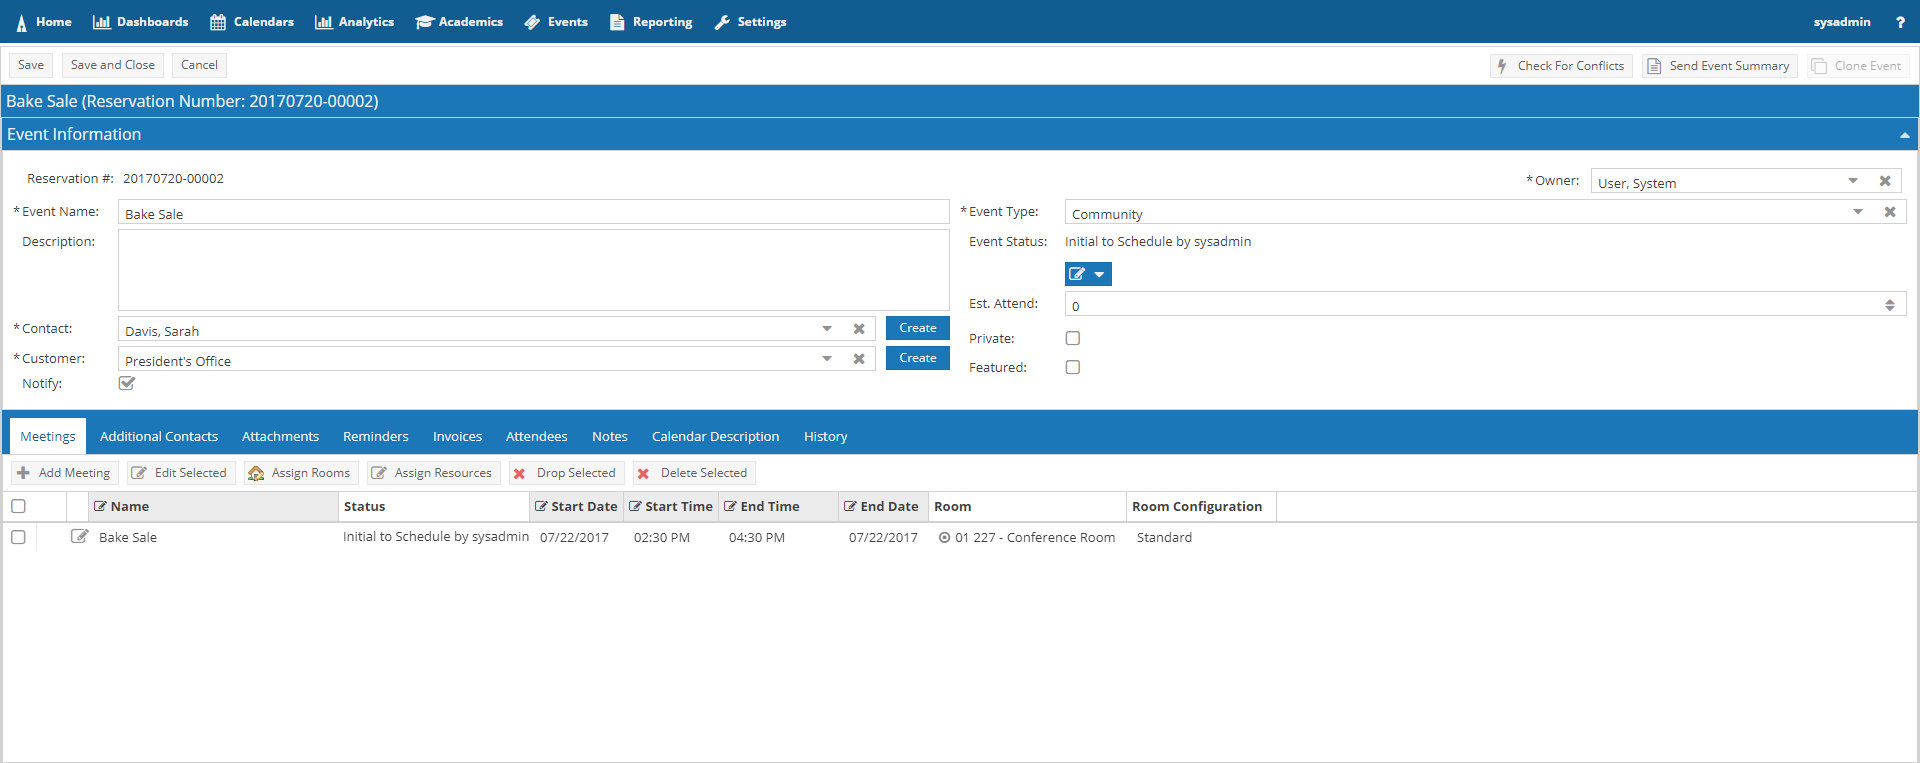
An event record in Astra Schedule includes the event name, customer, contact(s), and event type, and date, time, and location information for each meeting. Additional information such as setup and tear down times, scheduled resources, notes, and other more detailed information may be recorded per meeting as well.
After clicking on a specific event or event meeting record, the system will display the event form. The event form includes general information about the event in the top panel. This is where you will find the event name, event type, overall event status, description(s), reservation number, event owner, customer and primary contact (you may create new customers and contacts on-the-fly as needed), and estimated attendance. Additionally, you may flag the event as "private" to keep the details of the event accessible ONLY to other users that can view private events, or as "featured" so that the event is available for featured event calender, grid, and activity list filters.
All of these values are editable in the event form.

The Astra Schedule event workflow definition defines the possible event statuses and the conditions under which they are allowed. Editing the event status for an event reflects the scheduler's desired status. The workflow rules will determine whether or not that status is possible and then display the current state of the event. In many cases, a user setting the event status will result in a workflow state that matches their selection. (i.e. the user sets the status to "Scheduled" and the event in fact indicates that it is "Scheduled") However, there are times when the user's intended status may not yet be possible, and the workflow state will be out of sync with the selection. (i.e. the user sets the status to "Scheduled" but a requested item must first be approved, therefore the state is set to "Requested") The workflow system can be configured to be as simple or as complex as needed depending on your institution's business practices. See the Workflow help topic for more information.
To edit the status of an event, perform the following:
1.Open an event record you would like to edit.
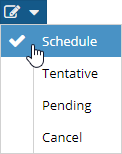
2.Click the change status button.

3.Select the desired status from the drop-down menu.
The status field will be updated to indicate the desired change.
4.Click Save.
If the selected status is possible based on your defined rules and the current state of the event, the status will update. Otherwise, it may stop at a different status pending another change to the event.
The history of internal and external messages generated for each event is logged and viewable from within the event. The notification history log displays the name or description of the message that was generated, the recipient(s), the sender, and the date the message was sent.
To view the message history for an event, click the History tab on the sub-tab menu within an event.

When an event record is saved the system automatically checks all meetings for any conflicts due to room or resource assignments or other scheduling problems created by setup and teardown times or other related activities associated with meetings. This validation check can be invoked manually at any time while working on an event. This can be handy when editing a complex event to help make sure that everything created is fitting in as intended.
To invoke the event validation and conflict checking utility, click Check for Conflicts at the top of the event form while editing an event.
![]()
If conflicts are detected, you will be prompted to either resolve the scheduling conflicts by selecting different rooms or return to the meeting list to resolve the conflicts through date/time edits.
When returning to the meeting list, the meetings with conflicts are highlighted and a warning icon is displayed. Hover over the icon to view the activity in conflict as show below.

Event access may be configured in several different ways:
Basic
•Event users may access only those events they created
Event Scheduler Group
•Event users may access events they created, plus events created by other users that are members of their group
Administrator
•User may access all events, regardless of owner
The event record "owner" determines who has access to the event. The owner field is automatically set upon event creation. However, the owner value may be edited in order to hand an event off to another user.
![]() NOTE: In order to edit the owner value, you must have access to the event in the first place. Additionally, if you change the owner and do not have access to that owner's events, you may lose access to the record.
NOTE: In order to edit the owner value, you must have access to the event in the first place. Additionally, if you change the owner and do not have access to that owner's events, you may lose access to the record.
To edit the event owner, perform the following:
1.Find an event you would like to edit on the list page or from some other access point.
2.Click to open the event.
3.Use the Owner drop-down menu to select the new owner from the list.
4.Click Save.