Additional Server Id - Special Cases
Majority of usecases require the use of only one Server Id generated in Step 1. There are a few special cases where it is required to generate additional Server Id. The special cases and the procedure to generate additional server Id are listed below:
Special cases
You will be required to generate additional Server Id for the following:
- For every new MAP Migration plan using the same Payer AWS account Id.
- For use of Amazon EMR (previously called Amazon Elastic MapReduce) service in the migration plan. Also, the additional server Id generated must be used to tag only Amazon EMR resources.
Generate Additional Server Id
Step - 1: Make a note of existing Server Info
- Go to the AWS Management Console and chose Migration Hub. If this is your first time using Migration Hub, you will need to choose its home region
- In the navigation pane, select Servers Under Discover
- Make a note of Server list including existing Server Info, and IP address. The Server List is used to avoid duplicates when generating additional Server Id in the next step.
Step - 2: Prepare CSV File
- Download the CSV file here, and modify the CSV file.
- In the IPAddress column, use an IP Address that is NOT already in the Server list that you have noted previously. E.g.
169.254.37.81or169.254.37.82or so on. The simple method to create an unique IP Address is increment last octet in the example. - In the Hostname column, add the following hostname:
samplehostname-1-MPE. The MPE number is provided at the top of your Migration Plan. Please use an Hostname that is NOT already in the Server list. Assuming MPE number is 12345, example Hostname can besamplehostname-1-MPE12345orsamplehostname-2-MPE12345or so on. The simple method to create an unique Hostname is increment digit between the two-. - In the Tags column, add the following tag/value:
aws-migration-project-id:MPE. The MPE number is provided at the top of your Migration Plan.MPEis case sensitive and must be upper case. E.g. aws-migration-project-id:MPE12345 - Save the changes made to the CSV.
Step - 3: Import CSV file to Migration Hub
- In the AWS Management Console, under services, go to Migration Hub
- In the navigation pane, select Tools Under Discover and then click Import
- In the Import name, add a name for the import task
- Click Go to S3, to upload the CSV file that you created earlier to any existing S3 bucket (or a new bucket if needed)
- In Amazon S3 Object URL, add the S3 object URL for the CSV file that you uploaded in the previous step
- Click Import. Once the import task completed, you will see the import details

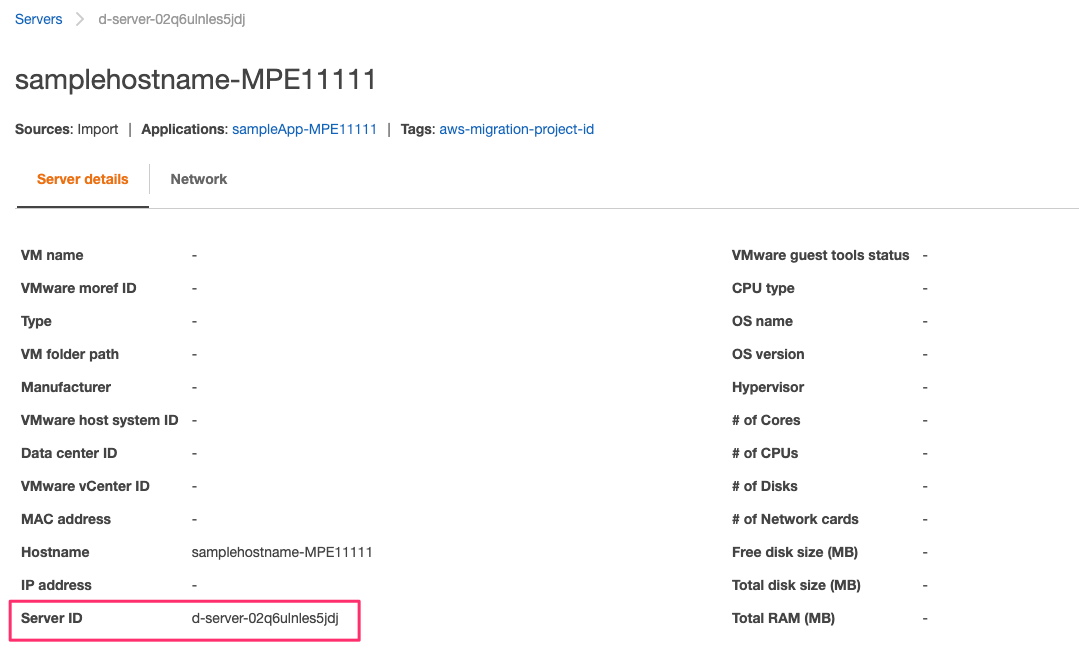
 In the example above MPE11111 is used. You should see the MPE number related to your MAP term.
 The Server ID obtained from the AWS Migration HUB has a value of d-server-… This should be the value used to tag your migrated workloads.